Search
For The Answer
Click here to access our database of
Plant Answers
Search
For The Picture
Click here to access the Google database of plants
and insects
Information
Index
Alphabetical Listing of Topics, Recommendations
and Plants

Milberger's Nursery and Landscaping
3920 North Loop 1604 E.
San Antonio, TX 78247
210.497.3760
nursery@milbergersa.com
Open 9 to 6 Mon. through Sat.
and 10 to 5 on Sun.
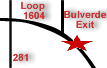
Three exits east of 281, inside of 1604
Next to the Diamond Shamrock station
Please click map for more detailed map and driving directions.

![]()

Prime Time Newspapers
Week of February 10, 2003
Submitted by Calvin Finch,
Ph.D., Manager, Conservation Division, Water Resources & Conservation
Department, SAWS, and Horticulturist
It is time to plant onions and potatoes in the garden. The soil temperatures are too cold for tomatoes, but it is not too early to buy transplants and pot them up so you have blooming plants placed in the garden in late March or April.
Commercial onion growers in Texas plant onion seed in October or November. Home gardeners can also plant seed, but it is considerably easier to purchase onion plants now and plant them. The best-known Texas onion is the 1015. It is a sweet yellow short-day onion developed by Texas A&M University. Other short-day onions are Granex, white Bermuda, and red hamburger. All will produce nice large bulbs in early June if you plant them now in your raised bed garden or a container.
Prepare the soil by working-in 2 inches of compost and applying a cup of slow-release lawn fertilizer such as 19-5-9 per 8 foot of row. The earlier you plant the onions, the closer together they can be planted. By the end of February they will need 4 inches of spacing if the bulb size is going to be large. I would plant them 2 inches apart and use every other onion for green onions later in February. Dr. Jerry Parsons, Texas Cooperative Extension Service Vegetable Specialist, reports it is difficult to over-fertilize onions. He recommends sidedressing each 8 foot of row with a half-cup of ammonium sulfate (31-0-0) or a cup of lawn fertilizer (19-5-9) every 2 to 3 weeks.
Harvest the onions in early June when the tops flop over. They store well on a picnic table in the shade. Use the onions as you need them.
Potatoes are more difficult to grow than onions, and they do not store well; but, if you have the space and ambition, a few meals of new potatoes boiled with the peels, garnished with parsley, and generously buttered are wonderful.
Seed potatoes are not as easy to find as they once were. Some retail nurseries and feed stores carry them. I like the red selections (Pontiac or La Soda); they seem to produce more than white potatoes in our climate.
Dig a trench 8 inches deep in the garden. Pile up the soil besides the trench so it can gradually be used to fill the trench as the stems emerge from the soil. It is also useful to add enough soil to the pile so that the row can be hilled up 4 to 6 inches above the surface of the garden.
To fertilize, spread 1 cup of slow-release lawn fertilizer in the trench and the first layer of soil used to cover the potatoes.
Cut the seed potatoes into two or three pieces so that each piece has at least one eye. Most gardeners let the cut piece “heal” or dry for a few days after cutting before they are planted. Space them 2 feet apart in the trench and cover with 3 or 4 inches of the soil. When the stems emerge 3 to 4 inches above the soil in the trench, add more soil so only 1 inch is visible. Repeat the process until the soil is used up and the hill is in place.
It is not necessary to fertilize potatoes after the initial soil preparation, and be careful about watering. The potatoes need regular even moisture but rot in soggy soil, especially late in the season.
Potatoes can be harvested when the tops begin to decline and some leaves yellow. I generally harvest them as we are ready to eat them. Harvest all that’s left if the rains start in early summer.
Potatoes are formed under the soil. To harvest them, use a turning fork inserted into the soil a few inches outside of the drip line all around the plant.
Watch for potato bugs. The beetles will strip your plants of foliage if you do not act. They can be picked off by hand or killed with malathion or carbaryl.
Texas potatoes are best used as new potatoes immediately after harvest. If you want to store them more than two or three days, they need to be cured. Curing can be accomplished by cutting off the top of the plant, and leave the potatoes in the ground for three to five days.
It is too early to put tomato transplants in the soil, but it is not too early to pot them up. For a tomato to prosper, the soil must be relatively warm. In the San Antonio area, the soil reaches good tomato temperature sometime after April 1. Unfortunately, the period between April 1 and May 31 is also our best time for development of fruit. To take advantage of this tomato-growing window, the plants should be blooming on or around April 1.
Sounds like a Catch 22, doesn’t it? The soil
temperatures are too cold for consistent tomato plant growth before
April 1 but, to maximize production, the plant needs to be setting
fruit by April 1.
To overcome this dilemma, buy your recommended tomato varieties now. Surefire, Celebrity, Heatwave, Sunmaster, Merced, Bingo, and Carnival are all good choices. Instead of planting them in the garden, place them in a 1 to 5 gallon container filled with high-quality potting soil. The black plastic containers used for nursery plants are ideal. They warm up quickly when placed in a sunny, sheltered spot on the patio. The warm soil maximizes growth rate.
Tomatoes are heavy feeders, so load up the pot with
Osmocote. One-quarter cup per container is not too much. You can also
fertilize every two weeks with a soluble fertilizer added to the watering
can.